
Master Sales Navigator account setup for scalable results
Master Sales Navigator account setup for scalable results
TL;DR:
- Effective LinkedIn Sales Navigator account setup is crucial to prevent wasted seats, access errors, and compliance issues, thereby maximizing ROI for SMB and mid-market teams.
- Deliberate account structuring, regular audits, and clear role permissions enable efficient team growth, reduce costs, and foster higher adoption rates.
Most sales teams spend thousands of dollars on LinkedIn Sales Navigator and quietly waste a significant chunk of that budget before a single rep books a meeting. Poor account setup is the culprit. It leads to unused seats, access errors, frustrated reps, and compliance headaches that nobody planned for. This guide is for B2B sales managers, operations leads, and team leaders at small to mid-sized companies who want to get the most out of every seat they pay for. We’ll walk through how smart account structuring creates real cost savings, supports team growth, and makes Sales Navigator actually work the way it’s supposed to.
Table of Contents
- Why account setup matters in sales tools
- Key steps: Structuring and provisioning Sales Navigator accounts
- Setup pitfalls and cost risks for SMB/mid-market teams
- Driving adoption and results through effective setup
- What most teams overlook about Sales Navigator account setup
- Get the most from your Sales Navigator investment
- Frequently asked questions
Key Takeaways
| Point | Details |
|---|---|
| Strategic setup minimizes waste | Careful account structuring prevents unused seats and streamlines sales team operations. |
| Role definitions are critical | Clearly separating admin and user rights limits risk and boosts data security. |
| Proactive management drives adoption | Consistent auditing and communication encourage higher team engagement with sales tools. |
| Setup impacts cost and results | A strong initial account setup leads to measurable savings and better sales performance. |
Why account setup matters in sales tools
When most people hear “account setup,” they picture a quick admin task: create a login, invite users, done. That assumption costs real money. Account setup in a B2B sales tool like Sales Navigator is actually a strategic decision that shapes how every user interacts with the platform, who has access to what, and whether your investment delivers results or quietly drains your budget.
For small and mid-sized businesses, the stakes are especially high. You’re not buying 500 seats with room to absorb waste. You’re buying 5, 10, maybe 20 seats, and every dollar needs to pull weight. That means setup decisions made on day one have a lasting impact on ROI.
Here’s what goes wrong when setup is rushed:
- Unused seats pile up. A rep leaves, their seat stays active, and you keep paying for it every month.
- Wrong users get elevated access. When too many people have admin rights, configuration errors multiply and become harder to trace.
- Workflow integration breaks down. If CRM sync or TeamLink features aren’t configured properly from the start, reps work around the tool instead of through it.
- Compliance exposure grows. LinkedIn’s terms of service require proper seat assignment. Sloppy setup can put accounts at risk.
“A practical methodology for SMB/mid-market B2B teams is to start by structuring accounts, then manage multi-user access with explicit seat permissions and admin roles so reps can use the tool safely without admin-level access.”
The cost efficiency angle is straightforward: if you’re paying for seats that aren’t properly configured, activated, or assigned, you’re getting less than half the value of your subscription. Understanding the Sales Navigator essentials before setup begins makes a real difference in avoiding these pitfalls.
Quick stat to keep in mind: Industry research consistently shows that SaaS tool underutilization rates in B2B companies range between 25% and 40%. For a premium tool with per-seat pricing, that kind of waste adds up fast, especially at the SMB level.
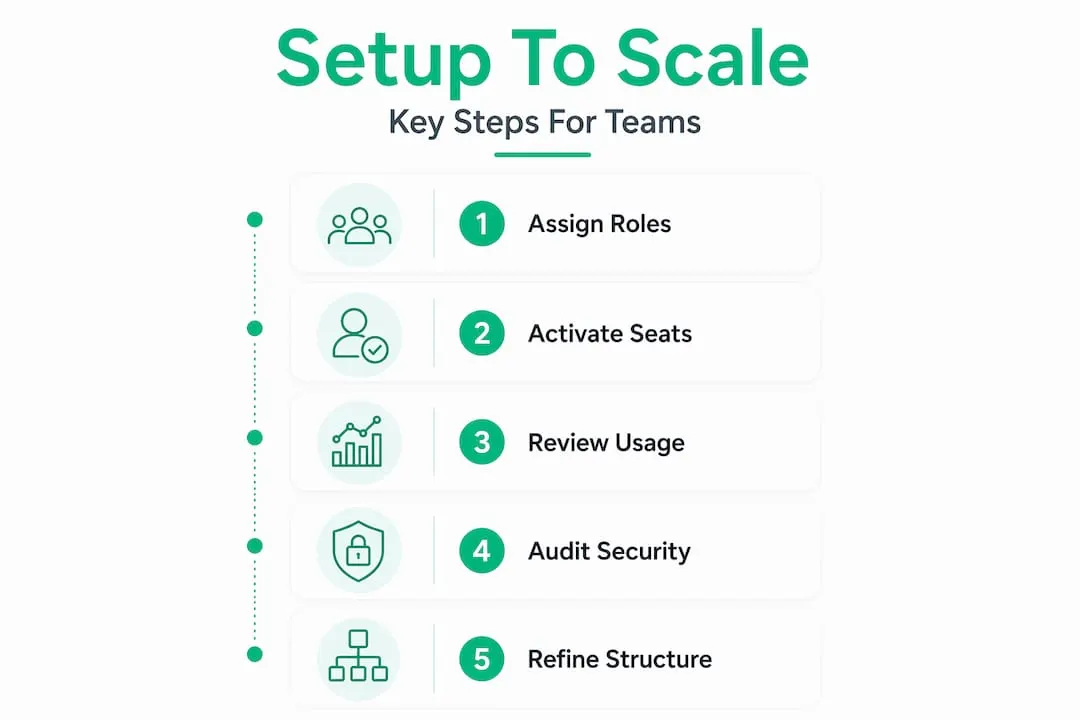
Key steps: Structuring and provisioning Sales Navigator accounts
Getting setup right is not complicated, but it does require deliberate thinking. Here is a step-by-step breakdown of how to structure Sales Navigator for a growing B2B team:
-
Designate one primary admin. Your admin controls seat assignments, billing settings, and access permissions. Start with one person in this role. Adding more admins creates confusion and increases the chance of conflicting changes.
-
Map out your team’s roles before inviting anyone. Know which users are reps (who need prospecting access) and which, if any, need elevated permissions for reporting or CRM management.
-
Assign seats based on actual use. Don’t invite users speculatively. Each seat should go to someone with a defined workflow in Sales Navigator, whether that’s outbound prospecting, account monitoring, or relationship tracking.
-
Set permissions explicitly during onboarding. Don’t rely on default settings. Review what each role can see and do, then match those defaults to your team’s actual needs.
-
Connect CRM integrations from day one. If your team uses Salesforce or HubSpot, configure the sync before reps start using the tool. This prevents data duplication and ensures activity tracking is accurate from the first touchpoint.
-
Document your setup decisions. This sounds basic, but most teams skip it. A simple shared document that lists who has what role and why makes future audits and role changes much faster.
The separation of duties is central to making this work. As dummies.com account management tips note, “admins manage backend settings and seat/permission governance, while reps get the feature set needed for execution but not admin controls like seat management.” That boundary protects your account integrity.
Here’s a comparison of admin vs. user roles so you can see exactly where those lines fall:
| Feature | Admin role | Rep/user role |
|---|---|---|
| Seat assignment and removal | Yes | No |
| User permission management | Yes | No |
| Billing and subscription access | Yes | No |
| Advanced search and prospecting | Yes | Yes |
| InMail messaging | Limited | Yes |
| Lead list creation | Yes | Yes |
| CRM activity sync | Configure | Use |
| Account and contact alerts | Yes | Yes |
| Usage analytics dashboard | Yes | No |
Pro Tip: When onboarding a new rep, assign them as a user first. Observe their usage for 30 days before considering whether they need elevated access. Most reps never need admin controls, and granting those rights by default is one of the most common setup mistakes we see.
Scaling seats as your team grows is easier when the initial structure is clean. Adding a new user to a well-documented, clearly permissioned account takes minutes. Adding a new user to a tangled account where nobody is sure who has admin rights takes hours and creates risk. Build the right structure early and scaling becomes a minor task rather than a recurring problem. Good prospecting workflow tips become much easier to implement when the account is properly structured underneath them.
Setup pitfalls and cost risks for SMB/mid-market teams
Even teams that follow a setup plan can fall into some predictable traps. Knowing these ahead of time is the fastest way to avoid them.
The most common setup errors include:
- Too many admins from the start. When every manager gets admin access “just in case,” you end up with conflicting settings, unintended seat changes, and accountability gaps.
- Unclear permissioning across roles. If nobody is sure what a rep can or cannot do, reps default to asking for more access, which creates admin sprawl over time.
- Orphaned seats after departures. When a team member leaves and nobody deactivates their seat, you keep paying for it. At $80 to $160 per seat per month, even one orphaned seat is a significant waste for a small team.
- No process for seat transfers. When a rep moves teams or a contractor’s engagement ends, there needs to be a clear handoff process. Without one, seats sit unused during transitions.
These problems compound over time. Account setup quality directly influences whether teams can scale without tool-seat waste, and admin-led provisioning with clear role baselines reduces the chance of orphaned or incorrect access during churn.
Here’s what the difference looks like in practice:
| Scenario | Well-structured account | Poorly structured account |
|---|---|---|
| Rep departs | Seat deactivated within 24 hours | Seat active for weeks or months |
| New hire joins | Seat assigned with correct permissions in one step | Multiple back-and-forth to clarify access |
| CRM sync issues | Traced and resolved via admin center quickly | Difficult to diagnose, reps work around it |
| Quarterly cost review | Clean usage data makes decisions easy | Unclear data leads to over-purchasing |
| Security audit | Roles and permissions are documented | No clear record of who has what access |
The financial impact is direct. One orphaned seat at the average Sales Navigator price costs roughly $1,000 to $2,000 per year. For a 10-person team, poorly managed seat transitions could easily waste $3,000 to $5,000 annually, money that could fund additional seats or other tools.

Pro Tip: Set a recurring monthly calendar reminder to audit active seats and permissions. Check for users who haven’t logged in during the past 30 days. Inactive seats are a clear signal that money is being wasted or that a user needs additional onboarding support.
The security dimension matters too. Accounts with too many admins or unclear access controls are more vulnerable to configuration errors that could violate LinkedIn’s terms of service. For teams that rely on Sales Navigator for their core lead generation activities, a suspended or restricted account is an immediate revenue risk. Building clean permissioning into your setup from the start protects the whole operation. Teams that want to apply smart sales strategies for SMBs need a solid account foundation to execute them.
Driving adoption and results through effective setup
A well-structured account does something beyond preventing problems. It actively enables your team to use Sales Navigator effectively, which is the whole point. High adoption rates don’t happen automatically. They’re engineered through thoughtful setup and deliberate onboarding.
Here’s how to connect your account structure to real adoption:
-
Communicate roles clearly at launch. When reps know exactly what they can do in the tool, they start using it faster. Uncertainty about permissions is one of the main reasons reps avoid new tools.
-
Run a short onboarding walkthrough for each new user. Even 20 minutes showing a rep where their lead lists are, how alerts work, and how to log activity to CRM dramatically improves early engagement.
-
Use the admin center analytics from day one. Sales Navigator provides usage data per seat. Check it weekly during the first 90 days to identify reps who aren’t logging in and understand why.
-
Create shared saved searches for the team. Admins can set up standard searches based on your ICP (ideal customer profile) that all reps can use immediately. This removes the learning curve for new users and creates consistency across the team.
-
Set up account alerts for key target companies. Configuring alerts at the account level means reps get notified when something changes at a target account, which drives timely, relevant outreach without extra manual effort.
“Managing multi-user access with explicit seat permissions and admin roles ensures reps can use the tool safely without admin-level access,” creating the conditions for confident, consistent use across the whole team.
When reps know their permissions, have immediate access to the features they need, and don’t have to navigate setup confusion, they spend more time prospecting and less time troubleshooting. That’s how setup translates directly into pipeline. Teams that learn to track this progress effectively by tracking engagement can tie admin decisions directly to rep performance metrics.
What most teams overlook about Sales Navigator account setup
Here’s the uncomfortable truth that most setup guides don’t acknowledge: account setup is not a one-time event. Treating it as something you do on day one and never revisit is one of the most expensive mistakes a sales team can make.
Sales teams change constantly. Reps join and leave. Territories shift. Your ICP evolves. The way your team uses Sales Navigator six months from now will look different from how you use it today. If your account structure was built for the team you had in January, it probably doesn’t fit the team you have in June. That mismatch creates exactly the kind of waste and friction we’ve been discussing.
We’ve seen this play out firsthand. A mid-sized B2B firm with 12 Sales Navigator seats reviewed their account structure after running a quarterly audit. They found three orphaned seats from departed reps, two users with admin access who hadn’t needed it in months, and five reps sharing lead list naming conventions that were inconsistent with their CRM. After a two-hour restructuring session, they reduced active seats by three, reallocated those savings to new hires, and reported a 15% improvement in seat utilization within 60 days. The technology didn’t change. The structure did.
The mindset shift is simple but powerful: think of account setup as a living system, not a completed task. The teams that get the most from Sales Navigator are the ones that schedule quarterly account reviews the same way they schedule pipeline reviews. They ask: who is using what, is the structure still matching the team’s actual workflow, and where is access being wasted?
Pro Tip: Block one hour per quarter to review your Sales Navigator admin dashboard. Export seat usage data, check for inactive users, and confirm that your admin roles still reflect who actually manages the account. This is the highest-leverage hour your admin will spend all quarter.
The broader lesson here is that setup is a growth lever. Teams that see it as a foundation they continuously refine will always outperform teams that see it as a box to check. If you want to go deeper on maximizing the tool’s prospecting power once your structure is solid, advanced prospecting tips are a natural next step.
Get the most from your Sales Navigator investment
Getting your account setup right is the first move. The second is making sure you’re not overpaying for the seats themselves. For SMB and mid-market teams, the standard retail price of Sales Navigator puts real strain on sales budgets, especially when you’re trying to grow headcount and toolstack at the same time.
At salesnavsplit.com, we offer discounted official Sales Navigator seats at around 50% below standard LinkedIn pricing. These are genuine, licensed seats sourced through verified reseller partnerships in the US and Europe, fully compliant with LinkedIn’s terms of service. Activation happens within 24 to 48 hours, billing is handled through Stripe with official invoicing, and setup is straightforward. For teams who want to apply everything covered in this guide without the full retail price tag, it’s a practical and secure way to start.
Frequently asked questions
What are the main admin roles in Sales Navigator account setup?
Admins in Sales Navigator handle backend settings, seat assignments, and user permissions, while sales reps primarily use prospecting features. As outlined in the Prontohq admin settings guide, structuring accounts with explicit seat permissions ensures reps work safely without accessing admin controls.
How does good account setup save money for small sales teams?
Well-managed setup prevents orphaned or unused seats and ensures only active, needed roles get paid seats. Account setup quality directly reduces wasted spend during team transitions like new hires, departures, and seat transfers.
What’s a common mistake to avoid during setup?
Granting admin access to too many users increases your risk of errors and wasted seats. A strong separation-of-duties model keeps admins managing governance while reps focus on execution.
How often should teams revisit their account structure?
Quarterly audits are recommended to keep the right users and roles in place as teams evolve. Even a one-hour review each quarter can surface inactive seats, outdated permissions, and structural mismatches that are costing money.
Can account setup influence overall sales adoption?
Yes, well-planned structure directly boosts team onboarding and long-term use of the tool. When seat permissions and roles are clear from day one, reps start using Sales Navigator faster and with greater confidence.
Recommended
- Boost Sales With These Proven Sales Navigator Tips - SalesNavSplit Blog
- Sales Navigator Plans: Choosing the Right Option for B2B Teams - SalesNavSplit Blog
- Streamline your sales prospecting workflow with Sales Navigator - SalesNavSplit Blog
- Advanced sales search: Smarter B2B prospecting with Navigator - SalesNavSplit Blog